Sewing is one of those things that I’ve always wanted to do, but never get around to learning because of a lack of free time. My mum and grandma are pretty much experts so it’s not like I don’t have the resources at my disposal, but it just seems so difficult! I think it’s because sewing’s extremely technical, which isn’t my usual way of doing things. Anyway, one of the few things I know how to make is the humble pencil case. My old one’s falling apart and I never see ones that I like, so I decided it was time to take up a new project!

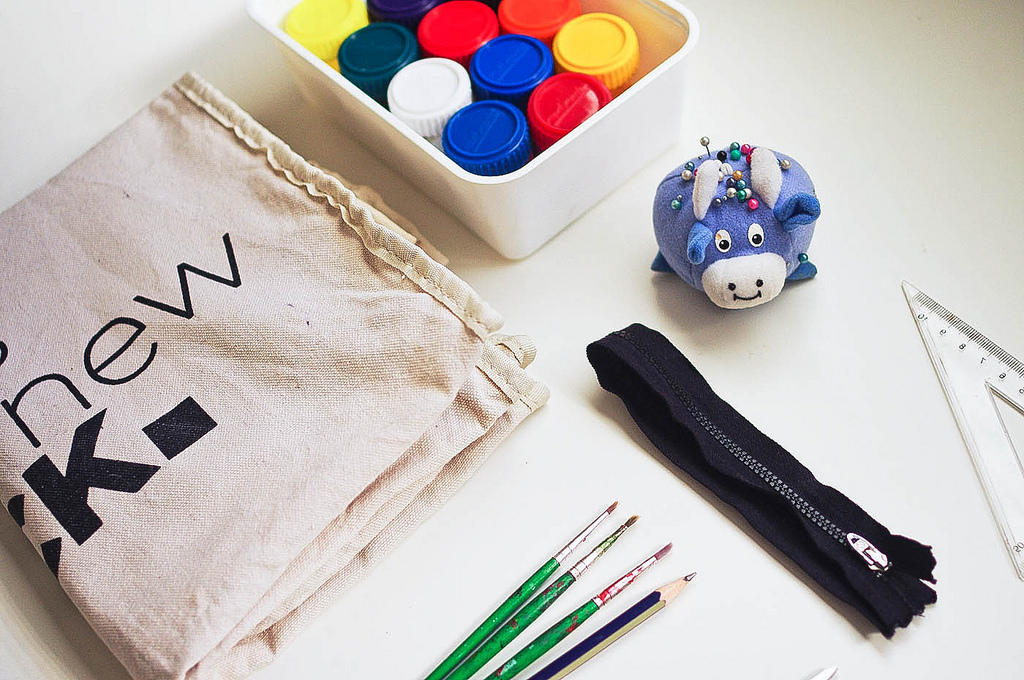
Things you will need include… canvas, material for your lining, a zipper, ruler, fabric paint, paint brushes and sewing paraphernalia (machine optional). Really, you can use calico or any other material but I just happened to recycle an old canvas tote I wasn’t using!
1. First, cut four 12x20cm rectangles (two for the exterior, and two for the lining). Make sure you iron them before moving onto next step!

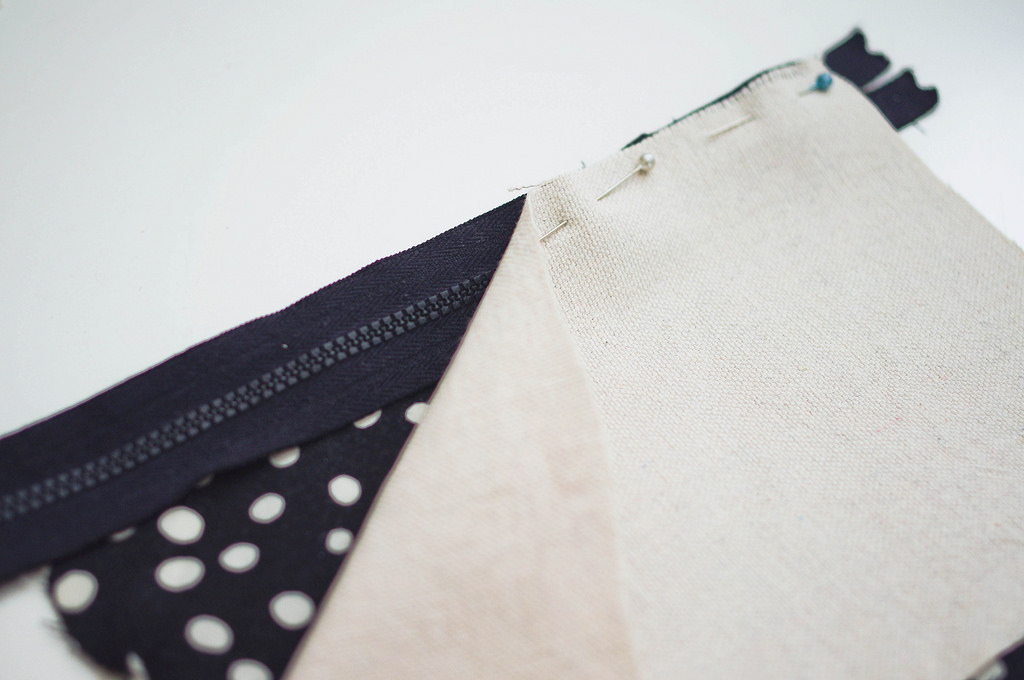
2. Line up and pin your fabric rectangles and zipper like in the photo. They should be in this order – lining facing upwards, zipper facing upwards, then the canvas with the right side facing downwards. Basting is optional, but I found it makes sewing easier later on!
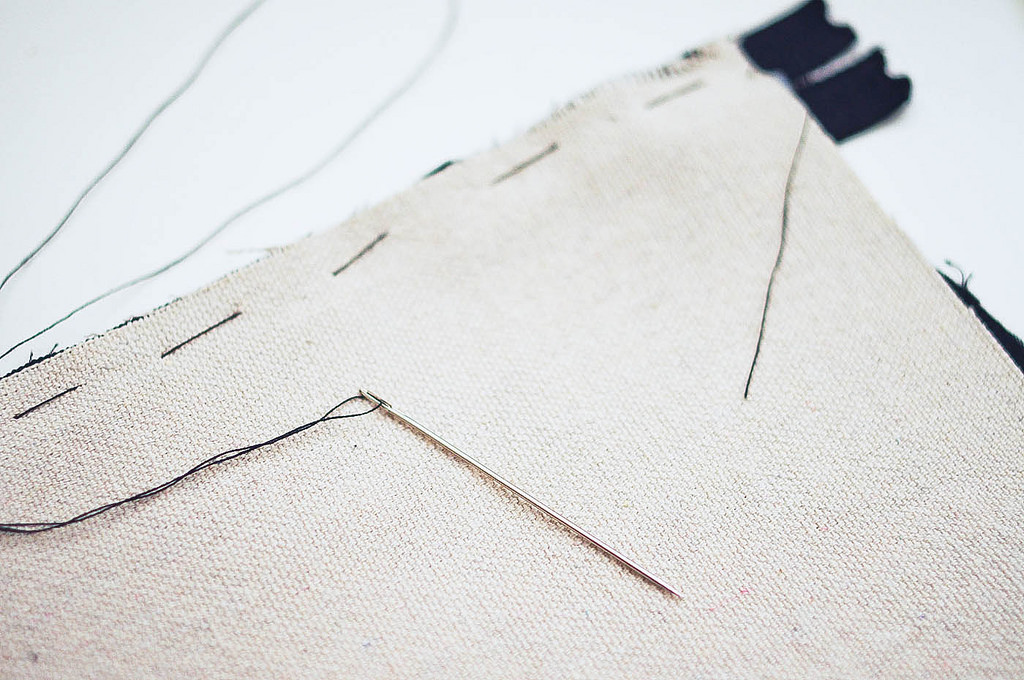
3. Sew a straight line that’s close to the zipper. If you’re using a sewing machine make sure you use a zipper foot, since it means you won’t risk getting stuck in the zipper teeth. If you mess up your straight line, just sew over the old stitch again until you’re satisfied.

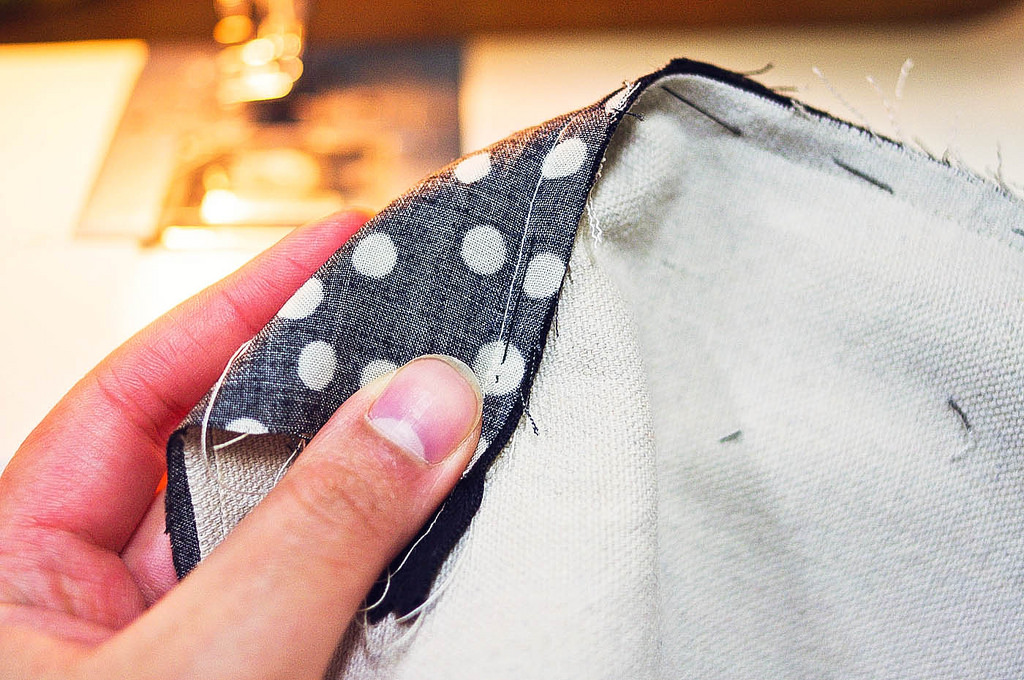
4. Repeat steps 2-4 on the other side of the zipper. Once you’re done with it, your work should look like something similar to this…

5. Bring the canvas and lining sides together, as shown below. Then open the zipper and makes sure the ends line up before stitching all around the edges. It’s completely fine to sew over the middle, but just make sure you leave a little gap in the lining! Once you’re done, trim any excess zipper.

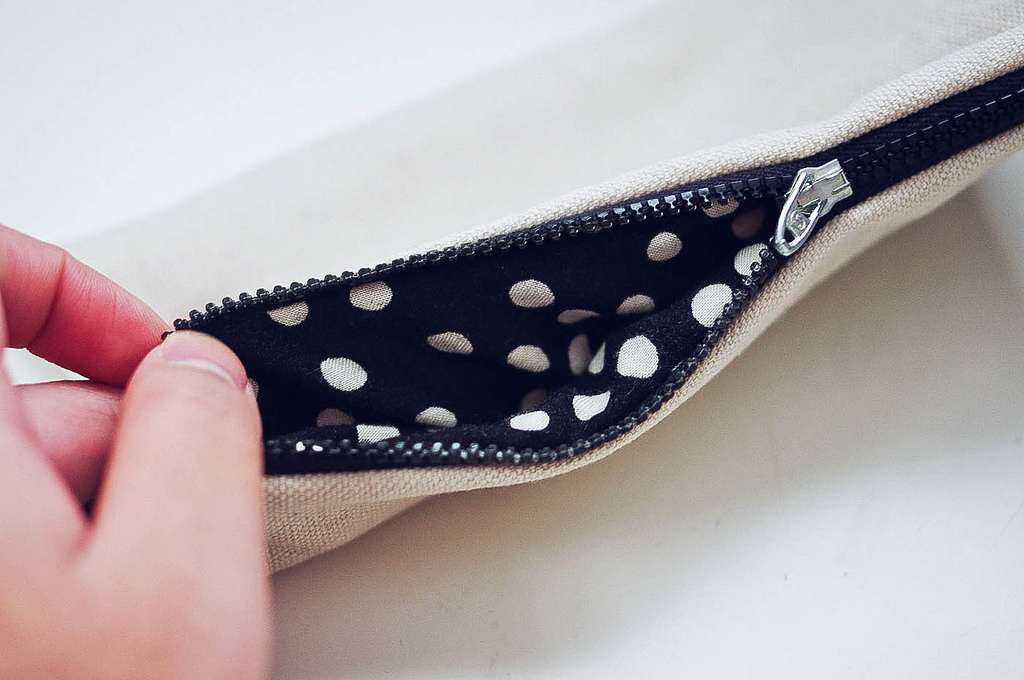
6. Turn your pencil case inside out through the gap, then sew it up. Voila! You should now have a blank canvas to work your magic on. If any of that was a bit hard to follow I recommend checking out this blog post, since it explains the sewing process a lot better than I do.


Here’s my favourite step, the painting bit! This should be pretty self-explanatory, but here are some tips that I picked up along the way:
- Make sure you take out the lining of your pencil case first so that you have a flat surface to work with.
- Always test your colours and brush strokes on some spare fabric, since they can be pretty unpredictable! This is even more important when working on rough materials like my canvas.
- Stencils are your best friend if you want to make a lot of similar shapes, like my flowers. They don’t even need to be fancy! I just cut out some makeshift ones from scrap paper and they held up fine.
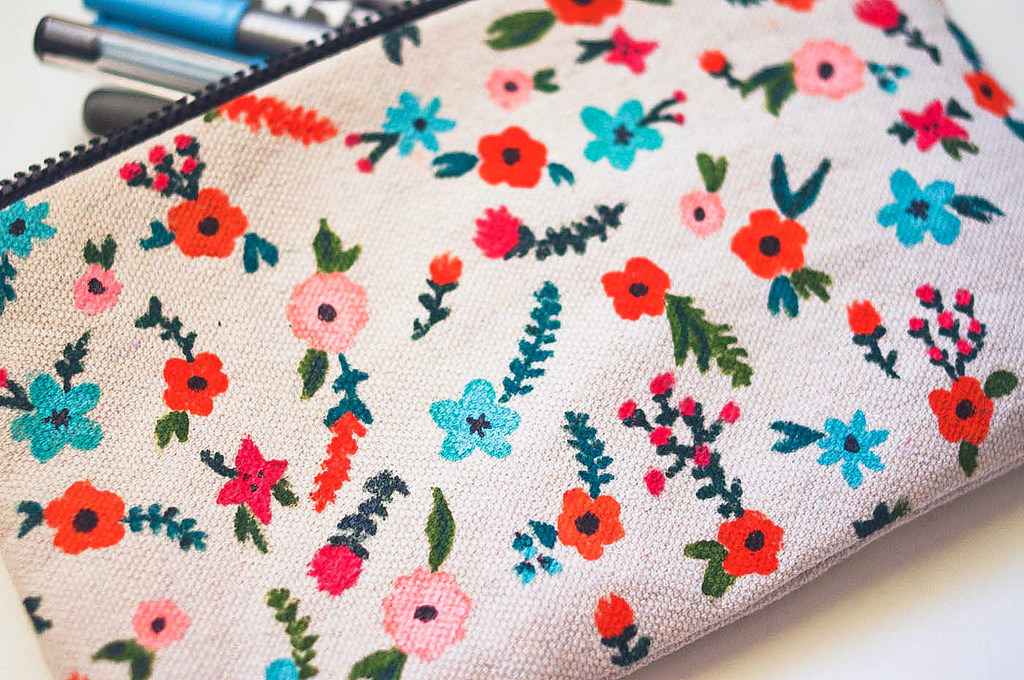
- Reference images are also really useful. Can you tell I was a little inspired by the lovely designs from Rifle Paper Co? Mine are definitely not as pretty, but I’m pleased with how they turned out!
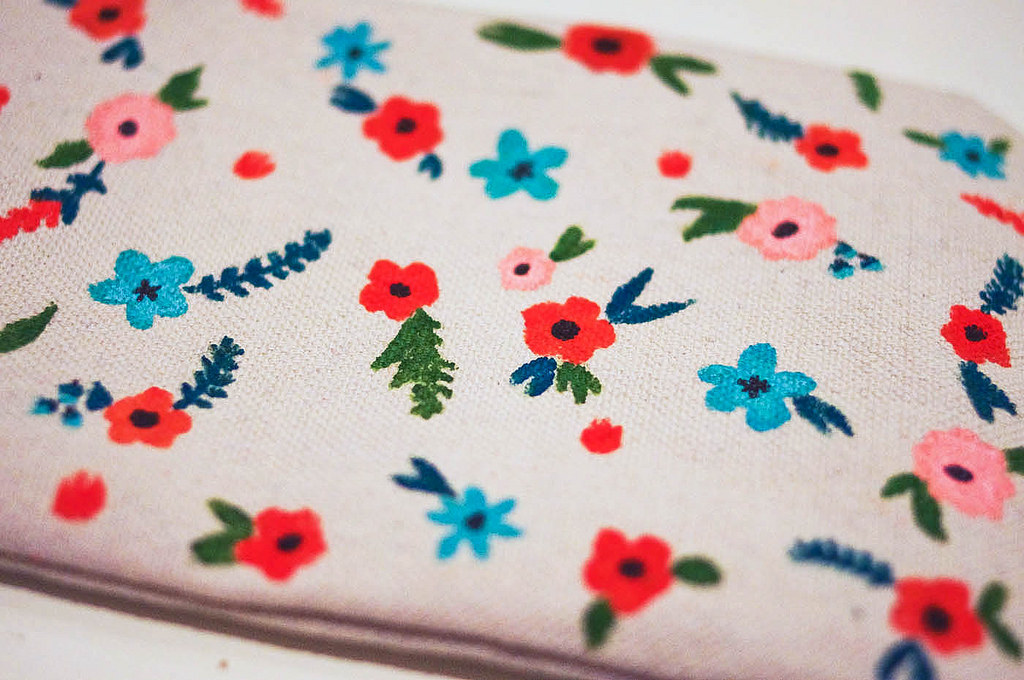
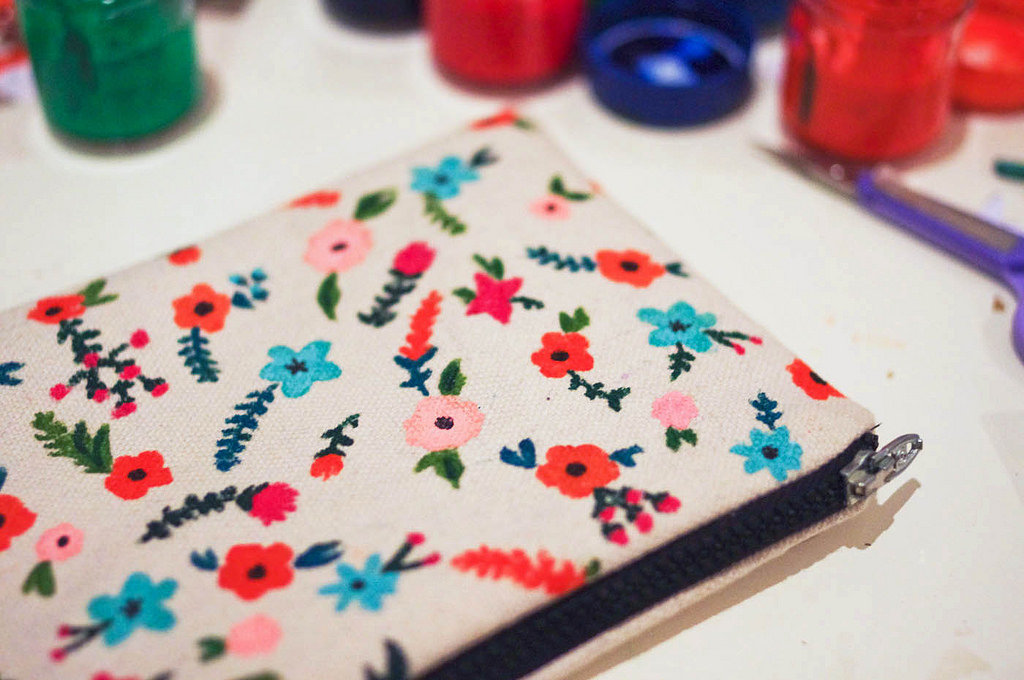
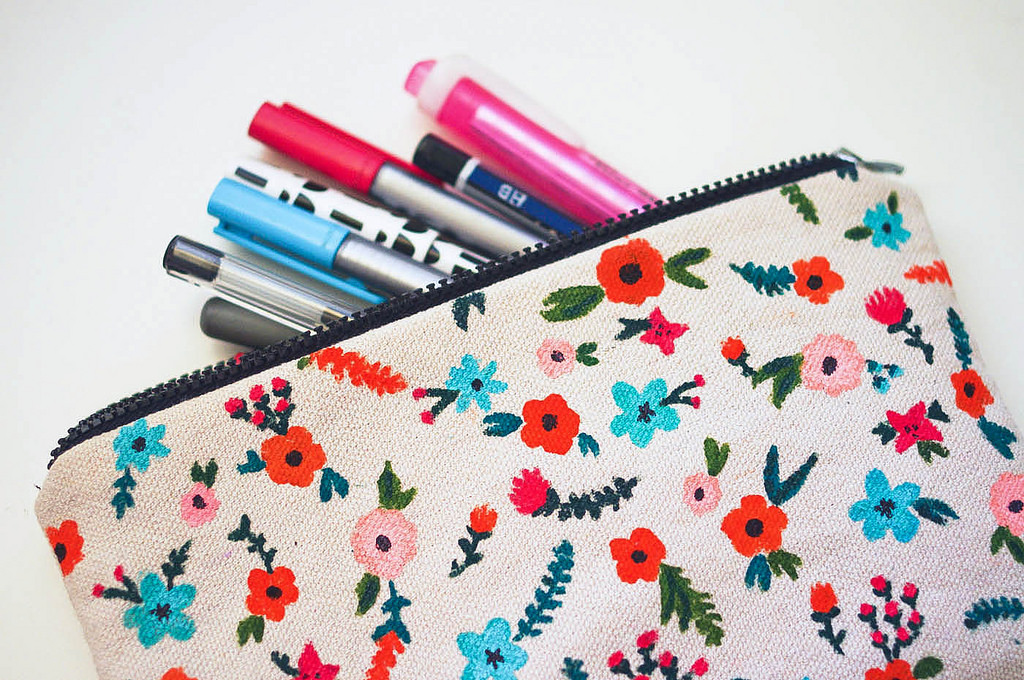
The finished product! I have a feeling I’ll be making a lot of these, not necessarily to use for pencil cases but also as multi-purpose bags. After all, I don’t think a girl can ever have too many make up pouches/coin purses/toiletry bags… Anyway, I hope you all have a great weekend ahead of you!